The Honeywell TH8320U1008 is a top-tier programmable thermostat offering advanced temperature control․ With a user-friendly touch-screen interface, it supports universal system compatibility, energy-saving features, and seamless installation processes․
Designed for versatility, this thermostat is ideal for both residential and light commercial use, ensuring precise temperature management and enhanced comfort․ Its intuitive design makes it a popular choice for modern HVAC systems․
1․1 Overview of the Honeywell TH8320U1008
The Honeywell TH8320U1008 is a state-of-the-art, touch-screen programmable thermostat designed for precise temperature control․ It features a sleek, user-friendly interface and supports multiple heating and cooling stages․
Compatible with a wide range of HVAC systems, this thermostat offers flexible scheduling options, dual-powered system capabilities, and energy-efficient settings․ Its advanced design ensures seamless integration with modern home systems․
1․2 Importance of Proper Installation
Proper installation of the Honeywell TH8320U1008 thermostat is critical for ensuring optimal performance, safety, and energy efficiency․ Incorrect installation can lead to system malfunctions, increased energy consumption, or even potential damage to the thermostat or HVAC system․
Following the installation manual carefully ensures compatibility with your HVAC system, correct wiring, and proper functionality of advanced features․ Improper installation may void warranties or result in unsafe operating conditions, making it essential to adhere to the guidelines provided by Honeywell․
Pre-Installation Requirements
Before installing the Honeywell TH8320U1008, ensure system compatibility, gather necessary tools, and review safety guidelines․ Proper preparation ensures a smooth and safe installation process․
2․1 System Compatibility Check
Verify that the Honeywell TH8320U1008 is compatible with your HVAC system․ This thermostat supports systems with up to 3 heating and 2 cooling stages․ It works with conventional, heat pump, and dual-fuel systems․ Ensure your system matches the terminal requirements (R, W, Y, etc․) and voltage specifications․ Compatibility with two-transformer systems requires removing the factory-installed jumper․ Always refer to the installation manual for specific system configurations to avoid installation errors; Proper compatibility ensures optimal performance and prevents potential system malfunctions․
2․2 Tools and Materials Needed
To install the Honeywell TH8320U1008, gather essential tools and materials․ A drill with a 3/16-inch bit is required for mounting holes․ Screwdrivers (Phillips and flathead) are needed for wiring connections․ Pliers may be necessary for wire stripping․ Ensure you have wall anchors for drywall support․ A voltage tester is crucial for verifying power disconnection․ Additional materials include fresh batteries (if using battery backup) and the thermostat’s mounting hardware․ Having these tools ready ensures a smooth and efficient installation process, avoiding delays or potential errors during setup․
2․3 Safety Precautions
Before installing the Honeywell TH8320U1008, ensure all safety precautions are followed․ Always disconnect power from the HVAC system at the circuit breaker or fuse box to avoid electrical shock․ Verify the power is off using a voltage tester․ Wear protective gear, including safety glasses and gloves, to prevent injury․ Never attempt installation without proper training or experience, as improper wiring can lead to system damage or safety hazards․ Follow the manufacturer’s instructions carefully, and if unsure, consult a licensed technician․ Safety should never be compromised during the installation process․
Disconnecting Power
Disconnecting power is the first critical step․ Switch off the HVAC system at the circuit breaker or fuse box․ Ensure power is off using a voltage tester․ This prevents electrical shocks and protects the system during installation․ Always follow safety guidelines to avoid hazards․
3․1 Understanding the Importance of Power Disconnection
Disconnecting power is essential for safe installation․ It prevents electrical shocks, protecting both the installer and the system․ Working on a live system can cause severe injury or damage․ Power disconnection ensures no accidental activation of the HVAC system during installation․ This step also prevents short circuits and potential damage to the thermostat or existing wiring․ Always verify the power is off using a voltage tester before proceeding․ Failure to disconnect power can lead to hazardous situations, emphasizing the critical need for this precaution․ Proper power disconnection is the foundation of a safe and successful installation process․
3․2 Steps to Safely Disconnect Power
To safely disconnect power, locate the circuit breaker or fuse box controlling the HVAC system․ Switch off the breaker or remove the fuse․ Verify the power is off using a voltage tester․ Ensure the system is completely deactivated before starting installation․ If unsure, consult a licensed electrician․ Never rely on the thermostat’s display to confirm power status․ Proper power disconnection prevents electrical hazards, ensuring a secure working environment․ Always follow these steps meticulously to avoid risks during the installation process․ This precaution is vital for both personal safety and system integrity․

Preparing the Site
Clear the area around the thermostat location, ensuring a clean and accessible workspace for installation; Prepare for drilling and wiring checks․
Ensure the site is free from debris and obstructions to facilitate smooth installation․ Verify all tools and materials are within reach to maintain efficiency․
4․1 Checking Existing Wiring
Before installation, inspect the existing wiring to ensure compatibility with the Honeywell TH8320U1008 thermostat․ Verify the wiring configuration and label each wire according to its function․ Check for any damage or wear that may affect performance․ Ensure the system is powered off during this process․ Refer to the terminal labels (R, W, Y, G, C, etc․) to confirm connections․ Remove any factory-installed jumpers if necessary, especially for two-transformer systems․ This step ensures a safe and proper installation, preventing potential issues with your HVAC system․
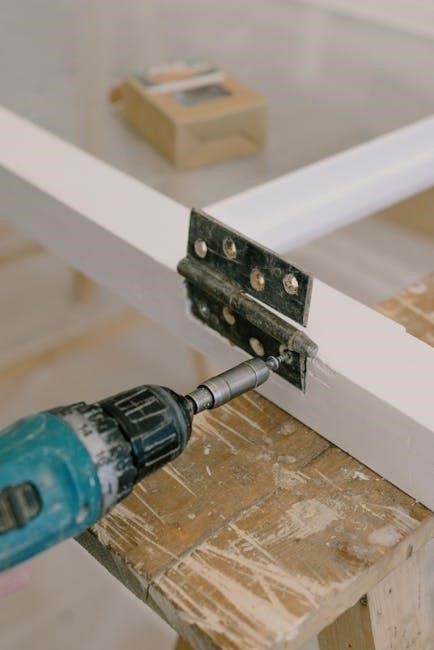
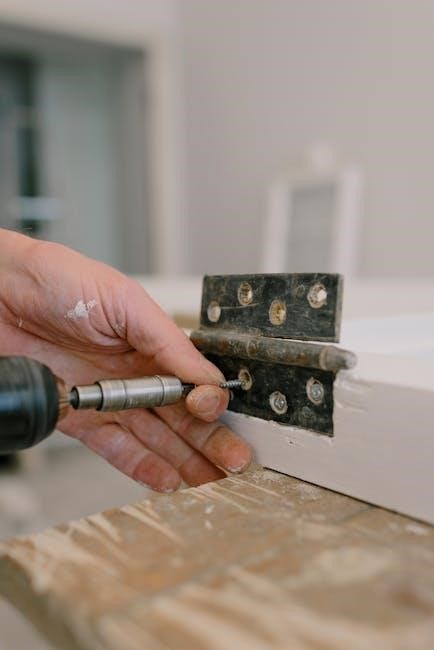
4․2 Drilling Holes for Thermostat Mounting
Drilling holes for the Honeywell TH8320U1008 thermostat mounting is a critical step․ Use a 3/16-inch drill bit to create pilot holes for the anchors․ Ensure the holes are level and aligned properly to secure the thermostat base firmly․ Avoid drilling near electrical wires or plumbing to prevent damage․ After drilling, gently hammer in the provided wall anchors to hold the thermostat base․ This ensures a sturdy installation and prevents the device from shifting over time․ Proper alignment and secure mounting are essential for reliable performance and aesthetic appeal․ Follow the manufacturer’s guidelines for accurate placement․ Always turn off power before starting any installation work․
Unpacking the Thermostat
Upon opening the package, you’ll find the Honeywell TH8320U1008 thermostat unit, mounting base, screws, wall anchors, and installation manual․ Verify all components are included before proceeding․
5․1 Components Included in the Package
The Honeywell TH8320U1008 package includes the thermostat unit, mounting base, screws, wall anchors, and an installation manual․ Optional components may include batteries for backup power․
- Thermostat Unit: Touch-screen programmable thermostat․
- Mounting Base: For secure wall installation․
- Screws and Wall Anchors: For installing the base․
- Installation Manual: Detailed step-by-step instructions․
- Batteries (Optional): For backup power if not wired to AC․
Ensure all items are present before starting installation․
5․2 Understanding the Thermostat Components
The Honeywell TH8320U1008 features a touch-screen display for easy navigation and programming․ The thermostat includes a mounting base with wiring terminals for system connections․ The base plate ensures secure installation, while the optional battery compartment provides backup power․ Understanding these components is essential for proper installation and operation․ The display allows users to set temperatures, schedules, and system modes․ Wiring terminals connect to HVAC systems, enabling precise temperature control․ Familiarizing yourself with these parts ensures seamless setup and optimal performance of the thermostat․
Mounting the Thermostat
Mounting the Honeywell TH8320U1008 involves removing the old thermostat and installing the new base securely․ Ensure proper alignment and leveling for optimal functionality and display accuracy․
6․1 Removing the Old Thermostat
Before mounting the new Honeywell TH8320U1008, disconnect power to the HVAC system at the circuit breaker or fuse box for safety․ Gently pull the old thermostat away from the wall to access the wiring behind it․ Carefully disconnect the wires from their terminals, taking note of their labels for future reference․ Remove any screws or clips holding the old thermostat in place․ Once the old unit is detached, set it aside and prepare the area for the new thermostat installation․ Ensure all wires are free from damage or tangles before proceeding․
6․2 Installing the New Thermostat Base
Begin by ensuring the wall surface is clean and dry․ Use the provided adhesive backing or mounting screws to secure the new thermostat base․ For drywall or plaster walls, drill pilot holes if necessary and insert wall anchors․ Peel the backing from the adhesive and press the base firmly against the wall, aligning it with the manufacturer’s markings․ If using screws, tighten them gently to avoid damaging the base․ Connect the wires to the appropriate terminals, matching the labels from the old thermostat․ Ensure all connections are secure and double-check the wiring before proceeding to the next step․
6․3 Mounting the Thermostat Unit
Once the base is securely installed, take the thermostat unit and align it with the base․ Gently push the unit onto the base until it clicks into place․ Ensure the unit is level and properly seated․ If using screws, insert them into the designated holes and tighten firmly without over-tightening․ Connect any remaining wires to their respective terminals, ensuring they are securely fastened․ Turn the power back on and test the thermostat to confirm it powers up and functions correctly․ Verify that the unit is evenly aligned and securely mounted to the wall for proper operation․
Wiring the Thermostat
Proper wiring is essential for the thermostat’s functionality․ Connect wires to the correct terminals, ensuring secure connections․ Refer to the manual for system-specific configurations․ Test all connections before restoring power․
7․1 Conventional Terminal Letters Explained
Understanding terminal labels is critical for correct wiring․ The Honeywell TH8320U1008 uses standard labels: R (heating power), W (heat stage), Y (cooling stage), G (fan), and C (common)․ These letters correspond to specific HVAC system connections, ensuring proper functionality․ Always refer to the system’s wiring diagram and the thermostat’s manual for accurate connections․ Improper wiring can lead to system malfunctions or safety hazards․ Verify all connections before powering up the system to ensure safe and efficient operation․
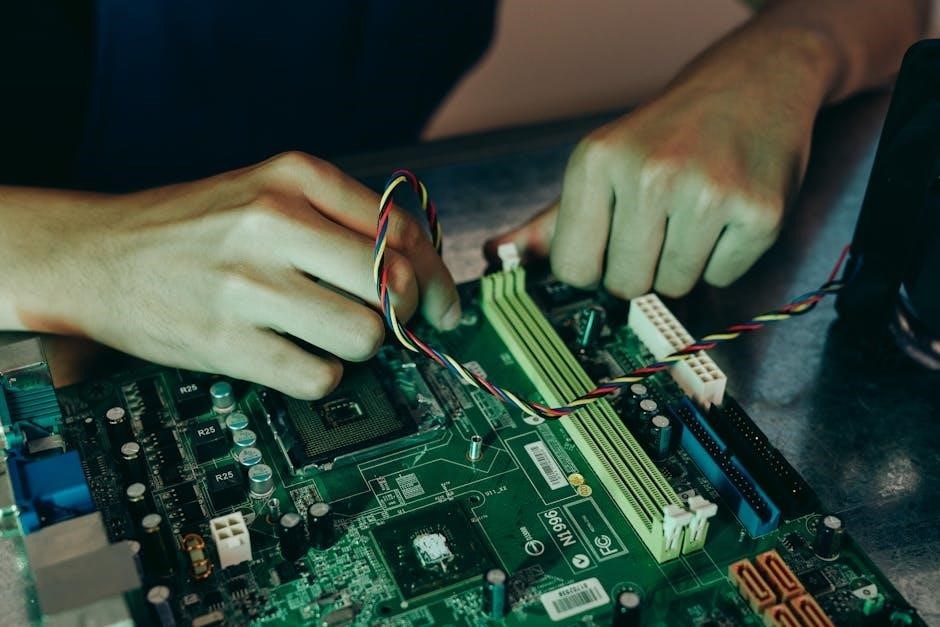
7․2 Connecting Wires to the Thermostat
Match the wires from your HVAC system to the thermostat terminals, ensuring secure connections․ Connect the R wire to the R terminal for heating power․ The W wire links to the heat stage, while the Y wire connects to the cooling stage․ The G wire controls the fan, and the C wire provides a common connection․ Tighten all screws firmly to avoid loose connections․ For systems requiring a common wire, ensure it’s properly installed․ If using a dual-transformer system, remove the factory-installed jumper․ Double-check all connections to prevent errors and ensure safe, efficient operation․ Proper wiring is essential for system functionality and safety․
7․3 Removing the Factory-Installed Jumper
The factory-installed jumper on the Honeywell TH8320U1008 is pre-configured for systems requiring a common wire․ If your system uses a two-transformer setup, remove the jumper to prevent incorrect voltage connections․ Locate the jumper on the terminal board, gently pry it out with a screwdriver, and set it aside․ Failure to remove the jumper in dual-transformer systems can lead to improper operation or damage․ Ensure power is disconnected before performing this step to avoid electrical hazards․ Refer to the wiring diagram in the manual for clarification․ Proper removal ensures compatibility and safe operation of your HVAC system․
Programming the Thermostat
Program the Honeywell TH8320U1008 to customize temperature settings, schedules, and energy-saving preferences․ Use the touch-screen interface to set heating and cooling targets, ensuring optimal comfort and efficiency․
8․1 Initial Setup and Configuration
The initial setup involves powering on the thermostat and selecting system preferences․ Choose between manual or automatic changeover modes, and set the time and date․ Use the touch-screen interface to configure basic settings like temperature units (Fahrenheit or Celsius) and system type․ Ensure the thermostat is set to match your HVAC system, whether it’s heating, cooling, or dual-powered․ Proper initial configuration ensures smooth operation and compatibility with your home’s climate control setup․ This step lays the foundation for advanced scheduling and energy management․
8․2 Setting Up Heating and Cooling Schedules
Setting up heating and cooling schedules on the Honeywell TH8320U1008 involves creating customized temperature profiles for different times of the day․ Using the touch-screen interface, program up to 7-day schedules with specific temperature settings for periods like wake, leave, return, and sleep․ This feature allows for energy-efficient operation by adjusting temperatures when you’re not home or when sleeping․ The thermostat supports multiple heating and cooling stages, ensuring optimal performance․ By tailoring your schedule, you can balance comfort and energy savings, making it an essential step in maximizing your thermostat’s capabilities․
8․3 Understanding Manual and Automatic Changeover
The Honeywell TH8320U1008 offers both manual and automatic changeover modes; Manual changeover (Heat/Cool/Off) requires the user to switch modes, providing direct control․ Automatic changeover (Heat/Cool/Auto) transitions between heating and cooling based on temperature setpoints, optimizing system performance․ The default is manual, but automatic can be enabled during setup․ This flexibility allows users to customize operation based on their preferences, ensuring efficient temperature management and comfort․ Proper configuration of this feature is essential for optimal system functionality and energy savings․
Testing the System
After installation, test the system to ensure proper operation․ Verify heating and cooling functions, check temperature accuracy, and confirm compatibility with your HVAC system type for optimal performance․
9․1 Verifying Proper System Operation
After completing the installation, verify that the Honeywell TH8320U1008 thermostat operates correctly․ Start by checking the display to ensure it powers on and responds to touch inputs․ Test heating, cooling, and fan modes to confirm proper functionality․ Ensure smooth transitions between modes and observe consistent temperature adjustments․ If the system does not respond as expected, review the wiring connections and settings for accuracy․
Verify that the thermostat accurately reflects the system type (heat/cool/auto) and stage of operation․ If all functions perform correctly, the installation is successful․ If issues arise, consult the troubleshooting section for resolution․
9․2 Checking for Proper Heating and Cooling
To ensure the Honeywell TH8320U1008 thermostat operates effectively, test the heating and cooling modes․ Set the thermostat to the desired temperature and verify if the HVAC system activates․ Check for consistent temperature changes and smooth transitions between heating and cooling modes․ Ensure the fan operates correctly in both auto and manual settings․ Verify that the system achieves the set temperature and maintains it within the specified differential․ If the system does not perform as expected, refer to the troubleshooting guide to address potential issues․
Confirm that all heating and cooling stages function properly, especially if your system supports multiple stages․ Ensure compatibility between the thermostat settings and your HVAC system for optimal performance․
9․3 Ensuring Thermostat Compatibility with System Type
Verify that the Honeywell TH8320U1008 thermostat is compatible with your HVAC system type․ Check the system’s terminal letters (e․g․, R, W, Y, C) to ensure proper wiring configuration․ Match the thermostat settings with your system’s capabilities, such as single-stage, two-stage, or heat pump systems․ Review the installation manual to confirm compatibility with dual-powered systems or multiple heating/cooling stages․ Ensure the thermostat is configured correctly for your system type to avoid operational issues․ If unsure, consult the manual or contact a certified technician for assistance․
- Confirm system type compatibility before finalizing installation․
- Adjust thermostat settings to align with your HVAC system․
- Refer to the manual for specific configuration instructions․
Proper compatibility ensures optimal performance and efficiency․
Advanced Features
The Honeywell TH8320U1008 offers advanced features like dual-powered systems, multiple heating/cooling stages, schedule flexibility, and a user-friendly touch-screen interface for enhanced convenience and energy efficiency․
10․1 Understanding Dual-Powered Systems
Dual-powered systems combine battery and hardwired power sources, ensuring continuous operation․ The Honeywell TH8320U1008 supports this setup, allowing it to function even during power outages․ By using optional batteries, the thermostat maintains settings and memory, eliminating the need for resets․ This feature is particularly useful in systems where uninterrupted operation is crucial․ Proper installation requires ensuring both power sources are correctly configured, as detailed in the manual․ This dual capability enhances reliability and user convenience, making it a standout feature for modern HVAC systems․
10․2 Configuring Multiple Heating and Cooling Stages
The Honeywell TH8320U1008 supports up to 3 heating stages and 2 cooling stages, offering precise temperature control․ This feature allows for efficient energy use by adjusting output based on demand․ During installation, configuring these stages involves setting the correct terminal connections and adjusting parameters in the thermostat’s menu․ Proper setup ensures optimal performance, reducing energy consumption and enhancing comfort․ The thermostat’s advanced interface simplifies stage configuration, making it accessible for both technicians and homeowners․ This flexibility accommodates various HVAC system types, providing a tailored solution for different environments and needs․
10․3 Exploring Schedule Flexibility
The Honeywell TH8320U1008 offers exceptional schedule flexibility, allowing users to customize temperature settings for up to 7 days; With multiple time periods per day, homeowners can tailor their comfort preferences to match their lifestyle․ The thermostat supports both manual and automatic changeover modes, enabling seamless transitions between heating and cooling․ Its compatibility with various HVAC systems ensures adaptability, while the intuitive interface simplifies schedule adjustments․ This feature enhances energy efficiency and comfort, making it ideal for households with varying daily routines․ By leveraging schedule flexibility, users can optimize energy usage while maintaining desired temperatures throughout the day․
Troubleshooting Common Issues
Troubleshooting the Honeywell TH8320U1008 involves identifying issues like wiring errors, power outages, or connection problems․ Always check connections, verify power supply, and consult the manual for solutions․
11․1 Identifying Common Installation Mistakes
Common installation mistakes with the Honeywell TH8320U1008 include improper wiring connections, failing to remove the factory-installed jumper in two-transformer systems, and incorrect system configuration․ Additionally, ignoring safety precautions like disconnecting power before starting can lead to electrical hazards․ Other issues include drilling incorrect hole sizes for mounting and misaligning the thermostat during installation․ These errors can result in malfunctioning or reduced efficiency of the thermostat․ Always refer to the manual to ensure correct installation practices and verify compatibility with your HVAC system type to avoid these pitfalls․
11․2 Resolving Power-Related Issues
Power-related issues with the Honeywell TH8320U1008 often stem from improper wiring or failure to disconnect power before installation․ Ensure the circuit breaker is turned off and verify wiring connections match the terminal labels․ If the thermostat doesn’t power on, check for blown fuses or tripped breakers․ For systems requiring dual transformers, ensure the factory-installed jumper is removed․ If using batteries, install fresh ones as specified․ After addressing these, restore power and test the thermostat’s functionality․ Always consult the manual for specific wiring configurations to resolve power-related problems effectively․
11․3 Fixing Wiring and Connection Problems
Wiring issues can often be resolved by verifying connections against terminal labels (R, W, Y, etc․)․ Ensure all wires are securely attached to the correct terminals to avoid loose connections․ For systems requiring dual transformers, remove the factory-installed jumper to prevent power conflicts․ If the thermostat malfunctions, check for miswired terminals and correct them according to the manual․ After addressing wiring issues, power on the system and test functionality․ Always refer to the installation guide for specific wiring configurations to ensure proper operation and avoid further connection-related problems․
Maintenance and Upkeep
Regularly clean the thermostat to ensure optimal performance․ Replace batteries if applicable and update software for enhanced functionality․ Proper upkeep extends the thermostat’s lifespan and reliability․
12․1 Cleaning the Thermostat
Regular cleaning ensures optimal performance and prevents dust buildup․ Power down the thermostat before cleaning․ Use a soft, dry cloth to wipe the screen and exterior․ Avoid harsh chemicals or liquids, as they may damage the display․ For stubborn stains, lightly dampen the cloth with water, but ensure no moisture enters the unit․ Cleaning maintains functionality and prolongs the thermostat’s lifespan․ Perform this maintenance every 2-3 months or as needed for optimal operation․
12․2 Replacing Batteries (If Applicable)
Battery replacement is necessary only if your Honeywell TH8320U1008 uses battery backup․ Ensure the system is powered down before starting․ Locate the battery compartment, typically on the back or bottom․ Remove the old batteries and insert fresh ones, matching the type specified in the manual․ Close the compartment securely․ If your thermostat is wired to AC power, batteries may not be required․ Always refer to the user manual for specific instructions and recommended battery types to maintain proper functionality and backup power capabilities during outages․
12․3 Updating Software or Firmware
Regular software updates ensure optimal performance and security for your Honeywell TH8320U1008 thermostat․ To update, visit Honeywell’s official website or contact customer support for the latest firmware version․ Download the update file and follow the provided instructions to transfer it to the thermostat․ Ensure the thermostat is powered on and connected to your system during the update process․ If issues arise, consult the user manual or seek assistance from a qualified technician․ Keeping your thermostat updated guarantees access to new features, improved functionality, and compatibility with your HVAC system․
The Honeywell TH8320U1008 installation process ensures efficient temperature control and system compatibility․ By following the manual, users can achieve optimal performance and energy savings effortlessly․
13․1 Summary of Key Installation Steps
The Honeywell TH8320U1008 installation involves disconnecting power, preparing the site, and carefully wiring the thermostat․ Start by ensuring system compatibility and gathering necessary tools․ Remove the old thermostat, mount the new base, and connect wires according to the terminal labels․ Configure settings like manual or automatic changeover and program schedules․ Test the system to verify proper operation․ Finally, perform a thorough check to ensure all components function correctly before restoring power․
13․2 Final Checks Before Operation
After installation, verify all wiring connections are secure and correctly labeled․ Ensure power is restored and the thermostat display activates․ Test heating and cooling modes to confirm proper system operation․ Review programmed schedules and settings for accuracy․ Check that manual and automatic changeover functions work seamlessly․ Ensure the thermostat is compatible with your HVAC system type․ Finally, confirm that the thermostat’s advanced features, like dual-power systems, are functioning as intended․ Perform a final walk-through to ensure all components are operational and aligned with your system requirements․
Leave a Reply