The Oster Convection Oven is a versatile countertop appliance designed for efficient cooking, featuring advanced functions like Turbo Convection for even heating and dehydration mode.
1.1 Overview of the Oster Convection Oven
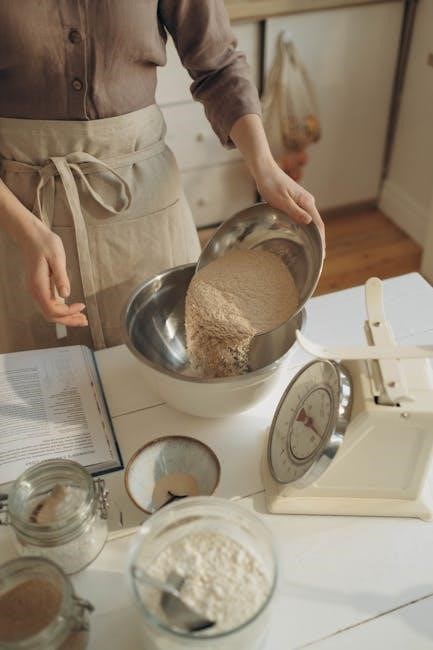
The Oster Convection Oven is a versatile and efficient countertop appliance designed for home cooking. It offers advanced features like Turbo Convection for faster, even heating, and a dehydration mode for preserving foods. With its spacious interior and easy-clean design, this oven is ideal for baking, broiling, toasting, and air frying. The user-friendly interface includes a function selector knob, temperature control, and a timer. Its compact size and powerful performance make it a practical addition to any kitchen, providing a wide range of cooking options for everyday meals and special dishes;
1.2 Key Features of the Oster Convection Oven
The Oster Convection Oven boasts a range of key features that enhance cooking efficiency and versatility. It includes a Turbo Convection setting for rapid air circulation, ensuring even cooking. The oven also features a stay-on function, allowing extended cooking times. With a digital interface, users can easily select from multiple cooking functions like bake, broil, and toast. The interior light provides visibility, while the removable crumb tray and easy-clean interior simplify maintenance. Its large capacity accommodates various dishes, making it a practical choice for diverse culinary needs.
1.3 Benefits of Using a Convection Oven
Using the Oster Convection Oven offers numerous benefits, including faster cooking times due to its advanced air circulation technology. It ensures even heating, resulting in crispier and more evenly cooked foods. The convection feature also allows for healthier cooking by reducing the need for excess oil. Additionally, it is energy-efficient compared to traditional ovens and provides versatility for tasks like baking, broiling, and dehydration. The oven’s compact design saves kitchen space while delivering professional-quality results, making it an ideal choice for home cooks seeking convenience and superior performance.

Installation and Setup
Installation and setup involve unboxing and inspecting the oven, placing it on a stable, heat-resistant surface, plugging it into power, and verifying all components are included.
2.1 Unboxing and Initial Inspection
When unboxing your Oster Convection Oven, carefully remove all items from the packaging and inspect for any visible damage. Ensure all components, such as the removable wire rack, crumb tray, and user manual, are included. Check the exterior and interior for scratches or dents. Verify that the oven’s door closes properly and that the control panel functions are intact. Before first use, ensure the oven is placed on a stable, heat-resistant surface and that all safety guidelines are reviewed. This initial inspection ensures optimal performance and safety.
2.2 Placement and Positioning Guidelines
Place the Oster Convection Oven on a stable, flat, and heat-resistant surface, ensuring at least 4 inches of clearance on all sides for proper ventilation. Keep it away from flammable materials, curtains, or other appliances that generate heat. Avoid positioning the oven near water sources or in areas prone to moisture. Ensure the oven is level to maintain even cooking performance. Do not place it in enclosed spaces or under cabinets without adequate ventilation to prevent overheating. Always follow the user manual’s placement recommendations for optimal safety and functionality.
2.3 Connecting the Oven to Power
Plug the Oster Convection Oven into a grounded electrical outlet rated for 120V to ensure safe and proper operation. Avoid using extension cords or overloaded circuits to prevent electrical hazards. Before connecting, inspect the power cord for damage and ensure the outlet is not shared with high-power appliances to maintain stable performance. Once connected, check that the oven’s power light illuminates to confirm it is ready for use. Always follow the user manual’s guidelines for safe electrical connection.

Safety Precautions
Always unplug the oven before cleaning and allow it to cool. Avoid overheating by monitoring cooking times. Keep children away from hot surfaces.
3.1 General Safety Guidelines
Always read the user manual before using the Oster Convection Oven. Ensure the oven is placed on a stable, heat-resistant surface. Keep children away from the appliance while in operation. Never leave the oven unattended during cooking. Avoid overheating by monitoring the timer and temperature settings. Use oven mitts when handling hot cookware. Do not store items on top of the oven, and ensure proper ventilation in the kitchen. Regularly inspect the power cord and plug for damage. Follow all safety guidelines to prevent accidents and ensure safe operation.
3.2 Electrical Safety Tips
To ensure electrical safety, always unplug the Oster Convection Oven before cleaning or maintenance. Avoid exposing the appliance to water to prevent electrical shock. Use the oven on a dedicated electrical circuit to avoid overloading. Keep the power cord away from hot surfaces and sharp objects. Never operate the oven with a damaged cord or plug. If an electrical issue arises, contact a qualified technician or Oster customer support immediately. Follow these guidelines to maintain a safe and reliable cooking environment.
3.3 Preventing Accidents and Injuries
To prevent accidents, always keep children away from the oven while it is in operation. Use oven mitts or tongs to handle hot cookware, as the surfaces can become extremely hot. Avoid touching the glass door or interior walls during cooking. Never leave the oven unattended, especially when cooking at high temperatures. Ensure the countertop is clear of flammable materials and keep the crumb tray clean to prevent fires. Always follow the user manual guidelines for safe operation and maintenance.
Operating the Oster Convection Oven
Operating the Oster Convection Oven involves selecting functions, setting temperature and timer, and using features like Turbo Convection for efficient cooking.
4.1 Understanding the Control Panel
The control panel of the Oster Convection Oven features a user-friendly interface with functions including temperature, timer, and mode selection. Key components include the function selector knob, temperature dial, and timer knob. The power light indicates when the oven is in operation. Additional features like the stay-on option allow for extended cooking sessions. Familiarizing yourself with these controls ensures easy operation and precise cooking results.
4.2 Selecting Cooking Functions (Bake, Broil, Toast, etc.)
The Oster Convection Oven offers multiple cooking functions, including bake, broil, toast, and dehydrate. Use the function selector knob to choose the desired mode. For baking, set the temperature and timer as needed. Broiling requires preheating and placing food on the broil rack. Toasting is ideal for even browning, while dehydration slowly removes moisture for snacks. Refer to the manual for specific settings to ensure optimal results for each function. This versatility allows you to achieve perfect cooking outcomes for various dishes.
4.3 Setting Temperature and Timer
To set the temperature and timer on your Oster Convection Oven, use the respective selector knobs. The temperature can be adjusted between 150°F and 450°F for precise control. The timer allows you to set cooking durations up to 60 minutes, ensuring your dishes are cooked to perfection. For optimal results, preheat the oven before cooking. The stay-on feature is ideal for longer cooking tasks. Always refer to the user manual for specific guidelines to ensure accurate temperature and timer settings for your recipes.
4.4 Using the Turbo Convection Feature
The Turbo Convection feature enhances cooking efficiency by using high-speed fans to circulate hot air evenly. To activate, press the Turbo Convection button on the control panel. This function ensures faster cooking times and crispier results. Ideal for roasting, frying, and dehydration, it distributes heat uniformly, preventing hot spots. Use this feature for recipes requiring precise air circulation, such as golden-brown vegetables or perfectly cooked meats. Refer to the user manual for specific guidelines on using Turbo Convection for optimal performance.
Maintenance and Cleaning
Regularly clean the interior and exterior with a damp cloth. Empty the crumb tray after each use to maintain optimal performance.
5.1 Cleaning the Interior and Exterior
To maintain your Oster Convection Oven, unplug it and let it cool before cleaning. Wipe the exterior with a damp cloth to remove splatters. For the interior, use a soft sponge or cloth dampened with water to clean walls and racks. Avoid abrasive cleaners or immersion in water. Regularly empty and clean the crumb tray to prevent food residue buildup. This ensures optimal performance and longevity of the oven. Always refer to the manual for specific cleaning guidelines to avoid damage;
5.2 Managing the Crumb Tray
Regularly cleaning the crumb tray is essential for maintaining your Oster Convection Oven. Pull out the tray, discard food debris, and wash it with mild soap and water. Avoid harsh chemicals to prevent damage. Dry thoroughly before replacing. For easier cleanup, line the tray with aluminum foil, but ensure it doesn’t block air vents. Check and empty the tray frequently to prevent residue buildup and maintain optimal oven performance. This simple maintenance step helps preserve hygiene and efficiency.
5.3 Maintaining the Oven’s Performance
To ensure optimal performance, regularly clean the interior and exterior of your Oster Convection Oven. Use a damp cloth to wipe down surfaces, avoiding abrasive cleaners that might damage finishes. Check for food residue and grease buildup, as these can affect heating efficiency. If available, use the oven’s self-clean function or run an empty cycle at high heat to burn off debris. Always unplug the oven before deep cleaning. Refer to the user manual for specific maintenance recommendations to keep your oven in peak condition and extend its lifespan.
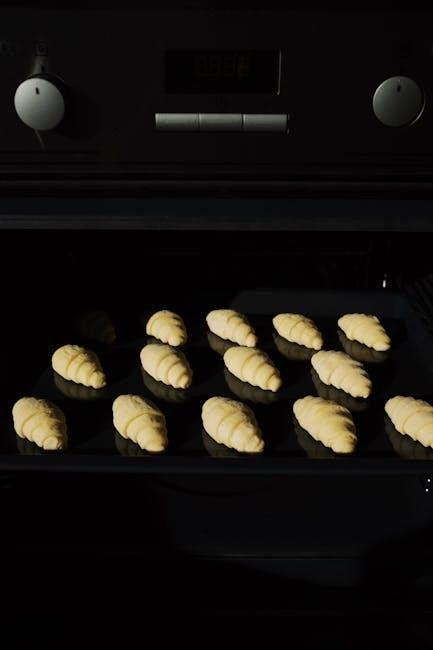
The Oster Convection Oven offers advanced features like dehydration mode, air frying, and a stay-on option, enhancing versatility in cooking and food preparation. The Oster Convection Oven features a dehydrating mode, perfect for creating healthy snacks like jerky, fruits, and vegetables. This mode uses low-temperature settings to slowly remove moisture, preserving nutrients and flavors. It ensures even drying without overheating, making it ideal for homemade treats. Simply place your food on the rack, select the dehydration option, and let the oven do the work. This feature is a great way to enjoy nutritious, customizable snacks year-round. Always monitor progress to achieve the perfect texture. The Oster Convection Oven offers an air frying feature that delivers crispy results with minimal oil, ideal for healthier frying. Using the Turbo Convection setting, it circulates hot air evenly, ensuring golden-brown finishes. Simply place food in a single layer on the rack, set the temperature and timer, and enjoy fried-like textures without extra fat. This mode is perfect for fries, chicken, and snacks, making it a versatile option for quick, tasty meals. Always refer to the user manual for specific temperature and time recommendations. The Stay-On feature allows for extended cooking sessions by keeping the oven active beyond the timer’s limit. Ideal for slow cooking or roasting, it ensures even heating without interruption. To activate, simply set the desired temperature and cooking function, then enable the Stay-On mode via the control panel. This feature is perfect for dishes requiring longer cooking times, offering convenience and consistent results. Always monitor cooking progress to avoid overcooking. Refer to the user manual for detailed instructions on using this function safely and effectively. Troubleshooting common issues with your Oster Convection Oven ensures optimal performance. Identify symptoms like uneven cooking or malfunctioning controls, then refer to the user manual for solutions or contact customer support. If your Oster Convection Oven isn’t heating, ensure it’s properly plugged in and the outlet is working. Check the power button and selector knob are correctly set. Verify the timer isn’t expired and the oven isn’t in standby mode. Inspect for tripped circuit breakers or blown fuses. Clean the interior and exterior to remove any blockages. If issues persist, refer to the user manual or contact Oster customer support for further assistance or potential repairs. Always unplug the oven before performing any troubleshooting steps. If your Oster Convection Oven is producing uneven cooking results, ensure proper air circulation by not overcrowding the oven. Check that the rack is correctly positioned and food is evenly spaced. Verify the temperature setting matches the recipe requirements. Preheating the oven before cooking can also help achieve consistent results. For optimal performance, use cookware compatible with convection cooking and avoid covering food unnecessarily. If issues persist, consult the user manual for troubleshooting or contact customer support for further assistance. Proper placement and settings are key to achieving even cooking. If the timer or controls on your Oster Convection Oven are not functioning properly, first ensure the oven is correctly plugged in and the circuit is working. Check that the timer is set accurately and the function selector is aligned properly. If issues persist, unplug the oven, wait a few minutes, and reset. Clean the control panel to remove any food residue or debris that may interfere with functionality. If the problem continues, refer to the user manual or contact Oster customer support for assistance or potential repairs. Regular maintenance can help prevent such malfunctions. The Oster Convection Oven supports various accessories like racks, trays, and non-stick pans, specifically designed for efficient convection cooking and easy food preparation. For optimal performance with the Oster Convection Oven, use cookware that distributes heat evenly, such as stainless steel, aluminum, or non-stick pans. Avoid glass or ceramic dishes, as they may shatter under high convection heat. Always ensure cookware fits securely within the oven’s dimensions. The oven’s crumb tray is ideal for catching food debris, making cleanup easier. Properly positioning racks and trays, as outlined in the manual, ensures consistent cooking results. Using the right cookware enhances both efficiency and safety while cooking. The Oster Convection Oven includes a removable wire rack and broil rack for versatile cooking. A crumb tray is provided for easy cleanup, catching food debris during cooking. Optional accessories like baking pans and pizza stones can enhance cooking performance. Ensure all racks and trays are properly positioned to maintain airflow and even cooking. These accessories are designed to optimize the oven’s functionality, making meal preparation efficient and convenient. Always refer to the manual for guidance on using and maintaining these components. The Oster Convection Oven excels at cooking a variety of dishes, from roasted vegetables to crispy meats and golden-brown baked goods. Use the dehydration mode for homemade snacks and ensure even cooking by adjusting settings as needed for perfect results. The Oster Convection Oven is ideal for cooking meats, vegetables, and snacks. Chicken, steak, and roasted vegetables cook evenly with the Turbo Convection feature. Air frying mode creates crispy results for fries and wings without excess oil. Dehydration mode is perfect for making homemade chips or jerky. Baked goods like cookies and bread also benefit from precise temperature control. Experiment with various recipes to maximize the oven’s versatility and achieve delicious, professional-quality outcomes every time. Preheat the oven before cooking for consistent results. Place food in the center rack for even cooking and avoid overcrowding. Use oven-safe cookware and spray food lightly with oil for crispiness. Regularly clean the crumb tray to maintain performance. Refer to the user manual for specific temperature and time guidelines. Experiment with the Turbo Convection feature for faster cooking. Always unplug the oven before cleaning and allow it to cool. Follow these tips to ensure optimal performance and delicious outcomes with your Oster Convection Oven. For optimal results, use the preset functions on your Oster Convection Oven, such as bake, broil, or toast, with recommended temperatures between 150°F and 450°F. Cooking times vary based on food type and quantity. For example, roasted vegetables typically require 20-30 minutes at 400°F, while frozen French fries may need 15-20 minutes at 400°F using the Turbo Convection feature. Always preheat the oven for 5-10 minutes before cooking. Refer to the user manual for specific guidelines and adjust times slightly for desired crispiness or tenderness. The Oster Convection Oven comes with a limited warranty covering manufacturing defects. For inquiries or issues, contact Oster customer service via their official website or support hotline. The Oster Convection Oven is backed by a limited warranty that covers manufacturing defects for a specified period. This warranty ensures that any faulty parts or issues arising from the manufacturing process will be addressed by the manufacturer. It’s important to review the warranty document provided with your oven to understand the terms and conditions, including what is covered and for how long. Proper registration and adherence to usage guidelines can help maintain warranty validity. Always refer to the official manual for detailed warranty information. For inquiries or assistance with your Oster Convection Oven, visit the official Oster website or refer to the user manual for contact details. You can reach customer service via phone, email, or through an online contact form. Be prepared to provide your product model number and a detailed description of your concern. Representatives are available to address questions about operation, troubleshooting, or warranty claims. Additionally, the website offers a wealth of resources, including FAQs and downloadable manuals, to help resolve common issues promptly and efficiently. The Oster Convection Oven is a versatile and efficient cooking solution, offering advanced features like Turbo Convection and dehydration mode for superior results. Explore its capabilities to enhance your culinary experience. The Oster Convection Oven is a powerful and versatile kitchen appliance that delivers exceptional cooking results. With its advanced features like Turbo Convection and dehydration mode, it offers flexibility for various cooking needs. The stay-on feature and easy cleanup options make it user-friendly. By following the user manual, users can maximize its performance and safety. Whether baking, broiling, or air frying, this oven enhances cooking efficiency and flavor. It’s a valuable addition to any kitchen, encouraging culinary exploration and convenience. Take your cooking to the next level by exploring the Oster Convection Oven’s advanced features. Discover the convenience of air frying for crispy results without extra oil and experiment with dehydration mode for homemade snacks. The stay-on feature offers flexibility for extended cooking tasks. Refer to the user manual to unlock these capabilities and enhance your culinary creativity. Embrace the versatility of this oven and enjoy the satisfaction of achieving professional-quality results in the comfort of your home;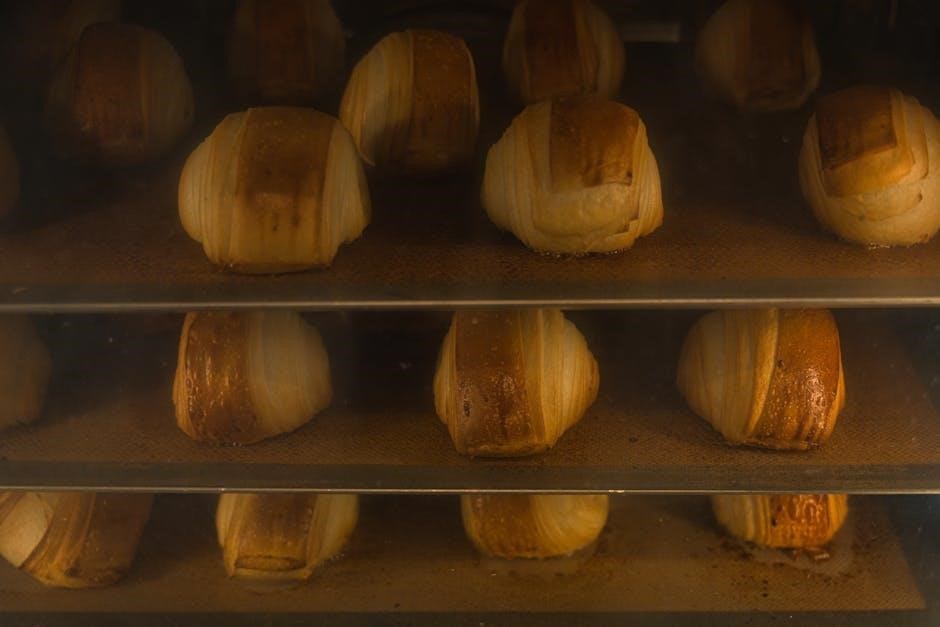
Advanced Features and Functions
6.1 Dehydrating Mode
6.2 Air Frying with the Oster Convection Oven
6.3 Using the Stay-On Feature

Troubleshooting Common Issues
7.1 Oven Not Heating
7.2 Uneven Cooking
7;3 Malfunctioning Timer or Controls
Accessories and Cookware
8.1 Recommended Cookware for Convection Cooking
8.2 Additional Accessories (Racks, Trays, etc.)

Recipes and Cooking Tips
9.1 Best Foods for Convection Cooking
9.2 Tips for Achieving Perfect Results
9.3 Recommended Cooking Times and Temperatures

Warranty and Customer Support
10.1 Understanding the Warranty
10.2 Contacting Oster Customer Service
11.1 Final Thoughts on the Oster Convection Oven
11.2 Encouragement to Explore More Features
Leave a Reply