Understanding trolling motor wiring is essential for safe and efficient boat operation. Proper installation ensures reliable performance, preventing electrical issues and maximizing your fishing experience.
1.1 Importance of Proper Wiring
Proper trolling motor wiring is crucial for safety, efficiency, and performance. Correct connections prevent electrical hazards, ensure consistent power delivery, and protect your motor from damage. Improper wiring can lead to short circuits, overheating, or even battery drain, which can be dangerous and costly. A well-installed system ensures reliable operation, extends component lifespan, and maximizes your fishing experience. Always follow guidelines to avoid potential risks and maintain optimal functionality.
1.2 Safety Considerations
Proper trolling motor wiring requires strict adherence to safety guidelines to prevent hazards. Always disconnect the battery before working on electrical systems to avoid shocks or short circuits. Use appropriately rated circuit protection devices, such as fuses or circuit breakers, to safeguard against overcurrent conditions. Ensure all connections are secure and insulated to prevent electrical arcing. Grounding the system correctly is vital to avoid electrical shock and ensure reliable operation. Neglecting safety practices can lead to serious risks, including fire or equipment damage.
Understanding Trolling Motor Components
A trolling motor consists of key components, including the motor, control system, and wiring. These parts work together to ensure smooth, controlled boat movement on the water.
2.1 Key Parts of a Trolling Motor
A trolling motor comprises essential components, such as the motor unit, which powers the propeller, and the control system, which includes foot or hand controls. The wiring harness connects the motor to the battery and control system, while the propeller and shaft ensure efficient water movement. These parts must be properly connected and maintained to ensure optimal performance and longevity of the motor.
2.2 Wire Color Codes and Their Functions
Wire color codes are crucial for identifying connections in trolling motor wiring. Typically, red indicates positive (+) power, while black denotes negative (-) or ground connections. Other colors like orange or white may be used for specific functions, such as auxiliary power or control signals. Always refer to the manufacturer’s guide for precise color assignments, as variations exist. Correct identification ensures safe and proper wiring, preventing electrical issues and enhancing system reliability.
Choosing the Right Wire Gauge
Selecting the correct wire gauge ensures efficient power delivery and minimizes voltage drop. The gauge depends on the trolling motor’s voltage and power requirements.
3.1 Determining the Correct Wire Size
Determining the right wire size for your trolling motor involves calculating the maximum current draw and considering the length of the wire run. A smaller gauge number indicates a thicker wire, which can handle more current. For example, 8-gauge wire is sufficient for shorter runs, while 6-gauge wire is better for longer distances to minimize voltage drop. Always consult a wire gauge chart to ensure proper sizing for your system’s voltage and power needs.
3.2 Importance of Wire Material and Insulation
Using high-quality wire material, such as copper, ensures excellent conductivity and durability. Copper wires are ideal for trolling motor applications due to their ability to handle high current loads and resist corrosion in marine environments. Proper insulation is equally crucial, as it protects the wires from abrasion, moisture, and heat buildup, preventing electrical failures and ensuring long-term reliability. Always choose wires with insulation rated for marine use to withstand harsh conditions.
Battery Selection and Configuration
Selecting the right battery and configuration is critical for trolling motor performance. Use deep-cycle, high-capacity batteries, such as lithium or lead-acid, configured in series or parallel to meet voltage and power requirements.
4.1 Types of Batteries for Trolling Motors
When selecting batteries for your trolling motor, consider lithium, AGM (Absorbent Glass Mat), or flooded lead-acid batteries. Lithium batteries are lightweight, offer high efficiency, and long lifespan. AGM batteries are maintenance-free, durable, and ideal for harsh conditions. Flooded lead-acid batteries are cost-effective but require regular maintenance. Each type has specific voltage and capacity ratings, so choose based on your motor’s voltage requirements and your fishing needs for optimal performance and reliability on the water.
4.2 Serial vs. Parallel Battery Configurations
Serial battery configurations increase total voltage while maintaining the same amp-hour rating, ideal for higher voltage trolling motor systems. Parallel configurations combine batteries to increase amp-hour capacity at the same voltage, extending runtime. A combination of both can provide higher voltage and capacity. Always use batteries of the same type and rating for consistent performance. Match your configuration to your motor’s voltage requirements and your fishing needs for optimal power delivery and efficiency on the water.
Circuit Protection
Protecting your trolling motor’s electrical system is crucial. Fuses offer traditional protection, but circuit breakers are recommended as they can reset and handle momentary overloads without interruption.
5.1 Fuses vs. Circuit Breakers
Fuses and circuit breakers both protect trolling motor circuits, but they function differently. Fuses are traditional and inexpensive, blowing when overloaded to prevent damage. Circuit breakers, however, can be reset without replacement, making them ideal for trolling motors. Breakers are preferred as they handle momentary overloads, like when motor blades encounter weeds, without interrupting operation. For trolling motors, circuit breakers offer convenience and reliability, while fuses require replacement after tripping.
5.2 Installing the Right Circuit Protection
Installing proper circuit protection is critical for safeguarding your trolling motor system. Choose a circuit breaker or fuse rated for your motor’s maximum current draw, ensuring it matches the wire gauge and battery setup. Mount the protective device near the battery to minimize voltage drop and heat buildup. Use marine-grade components designed for harsh environments and ensure all connections are secure and insulated. Regularly inspect the circuit protection system to prevent failures and maintain reliable operation.
Wiring the Trolling Motor
Wiring a trolling motor involves connecting the battery to the motor using appropriately sized wires. Ensure secure, marine-grade connections and regular inspections for wear or corrosion to maintain reliability.
6.1 Preparing the Wires
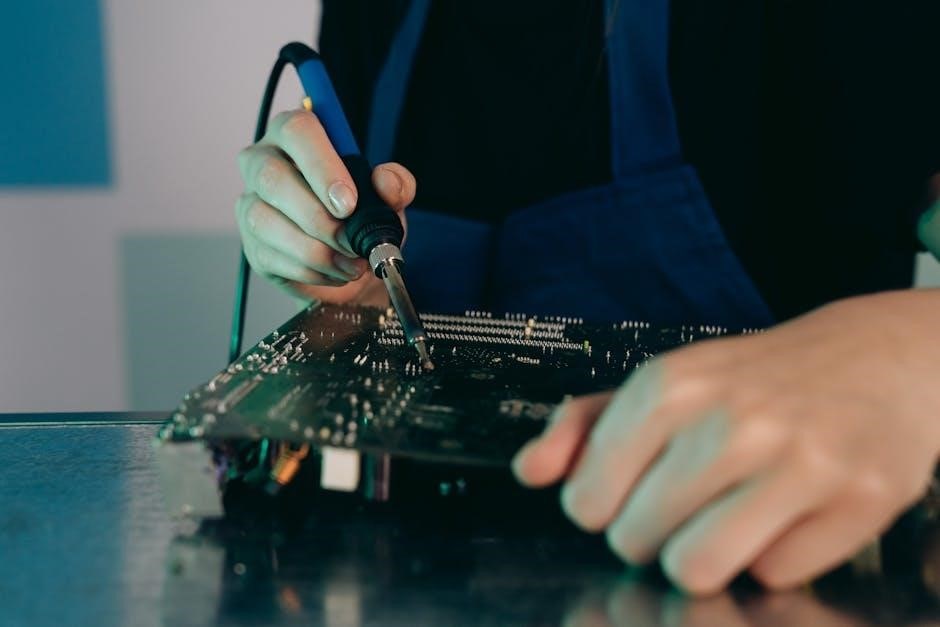
Preparing the wires involves stripping the insulation at the ends and attaching marine-grade connectors. Ensure wires are clean and free from corrosion for optimal conductivity. Use a wire stripper to carefully remove insulation without damaging the copper strands. Inspect wires for any signs of wear or damage and replace them if necessary. Securely crimp or solder connectors to prevent loose connections. Finally, apply heat shrink tubing or electrical tape to protect the connections from moisture and abrasion. This step ensures reliable performance and longevity of the wiring system.
6.2 Connecting the Wires to the Battery
Connect the red (positive) wire to the positive battery terminal and the black (negative) wire to the negative terminal. Ensure connections are secure with marine-grade terminals. Install a fuse or circuit breaker within 5-10 inches of the battery to protect the circuit. Use heavy-duty connectors to prevent corrosion and voltage drop. Double-check all connections for tightness and integrity. Avoid loose or corroded connections, as they can cause electrical issues. Keep the battery area clean and dry to ensure reliable power delivery to the trolling motor.
6.3 Connecting the Wires to the Motor
Connect the red (positive) wire to the motor’s positive terminal and the black (negative) wire to the negative terminal. Ensure wire colors match the motor’s wiring diagram. Use marine-grade connectors to secure the connections. Avoid reversing polarity, as it can damage the motor; Double-check all terminals for tightness and proper alignment. If the motor has additional features, such as a foot control, connect those wires according to the manufacturer’s instructions. Test the motor at a low speed to confirm proper operation before full use.
Control Systems for Trolling Motors
Control systems, including foot and hand controls, enable precise motor operation. They connect to the motor’s wiring, allowing speed and direction adjustments for seamless navigation and fishing experiences.
7.1 Foot Control vs. Hand Control
Foot and hand controls offer distinct advantages for trolling motor operation. Foot controls provide hands-free navigation, ideal for anglers managing fishing gear. Hand controls offer precise steering but require constant manual adjustment. Choose based on personal preference and fishing style for optimal performance. Proper wiring ensures smooth communication between the control system and motor, enabling seamless speed and direction adjustments during operation. Always follow manufacturer guidelines for installation and maintenance to ensure reliability and safety on the water.
7.2 Wiring the Control System
Wiring the control system requires careful attention to detail to ensure proper communication between the motor and control unit. Connect the positive and negative wires to the battery terminals, then link the control unit to the motor. Use appropriate wire gauges and secure connections to prevent voltage drop and interference. Proper insulation and routing of wires protect against environmental factors. Always follow the manufacturer’s wiring diagram to avoid errors and ensure smooth operation. Regular inspections maintain system reliability and performance over time.
Mounting the Trolling Motor
Mounting the trolling motor requires careful selection of a stable location to ensure optimal performance and control. Secure the motor firmly and manage wires properly for reliability.
8.1 Choosing the Right Mounting Location
Choosing the right mounting location for your trolling motor involves considering stability, accessibility, and control. Select a spot that provides clear operation and minimizes wire routing challenges. Ensure the motor is positioned to avoid obstacles, allowing smooth maneuverability. Proper placement enhances both functionality and safety, ensuring reliable performance during fishing trips. Always prioritize a stable and secure location to prevent vibration and ensure optimal motor efficiency.
8.2 Securing the Motor and Wiring
Securing the trolling motor and wiring is crucial for durability and performance. Use marine-grade bolts and brackets to mount the motor firmly, preventing movement during operation. Protect wires with heat-resistant sleeves or waterproof tape to shield them from abrasion and moisture. Ensure connections are watertight and tightly sealed. Regularly inspect the setup to avoid loose components or damage from environmental factors, ensuring safe and reliable functionality on the water.
Grounding the System
Proper grounding ensures electrical safety and prevents motor malfunction. Connect the negative wire to the battery’s negative terminal and ensure all metal components are securely grounded.
9.1 Importance of Proper Grounding
Proper grounding is crucial for electrical safety and system performance. It prevents voltage leaks, reduces electromagnetic interference, and protects against electrical shock. A well-grounded system ensures reliable operation of the trolling motor and connected components. Without proper grounding, the motor may malfunction, and safety risks increase. Always ensure the negative terminal is securely connected to the battery and a direct path to ground exists. This prevents corrosion and maintains optimal circuit functionality.
9.2 How to Ground the Trolling Motor System
To properly ground the trolling motor system, connect the negative (black) wire from the motor to the negative terminal of the battery. Ensure the battery is grounded to the boat’s hull or a metal frame. Use a wire brush to clean all connections before securing them. Avoid grounding through the engine or other accessories unless specified. Regularly inspect the grounding system for corrosion or damage. Proper grounding ensures electrical safety, reduces interference, and prevents voltage leaks, safeguarding both the motor and operator.
Troubleshooting Common Issues
Identify blown fuses or tripped breakers. Check for incorrect wire gauge causing voltage drops. Inspect connections for corrosion or damage. Verify battery charge levels.
10.1 Identifying and Solving Wiring Problems
Start by checking for blown fuses or tripped breakers, as these are common issues. Inspect the wire connections for corrosion or damage, ensuring they are secure. Verify the correct wire gauge is used to prevent voltage drop. Check for short circuits by testing continuity with a multimeter. If the motor doesn’t run, ensure the battery is fully charged and connections are clean. Consult a wiring diagram specific to your trolling motor model for precise troubleshooting guidance. Addressing these issues promptly ensures reliable operation and extends system lifespan.
10.2 Common Mistakes to Avoid
Avoid using the wrong wire gauge, as it can lead to voltage drop and overheating. Never mix different wire gauges in the same circuit. Ensure all connections are secure and free from corrosion. Avoid overloaded circuits, which can cause fuses to blow repeatedly. Do not neglect to install proper circuit protection, such as fuses or breakers. Always use marine-grade materials to withstand harsh environments. Finally, avoid skipping regular inspections, as this can lead to unnoticed issues. Following these guidelines ensures a safe and reliable trolling motor system.
Maintenance and Upkeep
Regularly inspect wires for damage or corrosion, and clean connections to ensure optimal performance. Replace worn-out components promptly to prevent system failures. Schedule annual checks of the trolling motor and battery terminals to maintain reliability and safety. Proper upkeep extends the lifespan of your trolling motor and ensures consistent operation during fishing trips.
11.1 Cleaning and Inspecting the Wiring
Regularly inspect trolling motor wires for signs of wear, corrosion, or damage. Use a wire brush to clean terminals and connections, ensuring good conductivity. Check insulation for cracks or frays, and replace any compromised wires. Apply a marine-grade grease to terminals to prevent corrosion. Inspect wire connectors and crimped joints for looseness or damage. Schedule annual wiring checks to maintain system reliability and ensure safe operation. Cleanliness and thorough inspections prevent electrical failures during use.
11.2 Regular Maintenance Tips
Regular maintenance ensures longevity and reliability of your trolling motor wiring. Store wires in a dry place during off-season to prevent moisture damage. Use a multimeter to check for voltage drops and connections. Replace corroded terminals and tighten all connections annually. Apply dielectric grease to connectors to shield from corrosion. Avoid overloading circuits and keep wiring organized to prevent tangles. Schedule professional inspections every few years, especially for high-use systems. Consistent upkeep prevents unexpected failures and enhances performance.

Safety Precautions
Always disconnect the battery before wiring work. Use insulated tools to prevent shocks. Avoid overloading circuits to reduce fire risks. Ensure proper grounding for safety.
12.1 Electrical Safety While Wiring
Electrical safety is crucial when wiring a trolling motor. Always disconnect the battery before starting work to prevent shocks or short circuits. Use properly rated circuit breakers or fuses to protect against overloads. Ensure all connections are secure and insulated to avoid accidental grounding. Never touch live wires with bare hands, and use insulated tools to handle electrical components. Proper grounding of the system is essential to prevent electrical hazards and ensure safe operation.
12.2 Safe Operation of the Trolling Motor
Safe operation of a trolling motor involves careful handling and awareness of surroundings. Always monitor water conditions and obstacles to avoid damage. Use the control system responsibly, ensuring hands or feet are clear of moving parts. Keep the motor secure to prevent shifting during operation. Regularly check battery levels to avoid depletion and ensure proper function. Be mindful of weather conditions and water depth to maintain control and avoid accidents. Proper operation enhances safety and prolongs the motor’s lifespan.
Advanced Configurations
Explore dual trolling motor setups and accessory integration for enhanced performance. Advanced wiring techniques allow customization, ensuring optimal control and functionality for specialized fishing or boating needs.
13.1 Dual Trolling Motor Setup
A dual trolling motor setup enhances control and efficiency, especially for larger boats. Wire both motors in parallel to ensure synchronized operation. Use heavy-duty wires to minimize voltage drop. Install a high-capacity circuit breaker and ensure batteries are appropriately sized for combined power demand. Proper grounding and insulation are crucial. This configuration allows independent or simultaneous operation, improving maneuverability and performance. Consult wiring diagrams and manufacturer guidelines for a safe and reliable installation.
13.2 Adding Additional Accessories
Enhance your trolling motor system by integrating accessories like GPS, depth finders, and lights. Ensure each accessory is wired correctly, using appropriate gauges and connectors. Install a marine-grade circuit breaker or fuse for each addition. Ground all components properly to prevent interference. Use waterproof connectors and seal any exposed wiring. Regularly inspect and maintain these connections to ensure reliability. Always follow manufacturer guidelines for compatibility and installation to avoid electrical issues and optimize performance. This setup improves functionality and overall boating experience.
Proper installation and regular maintenance ensure safety and efficiency, enhancing your boating experience. Always follow guidelines for optimal performance and trouble-free operation of your trolling motor system.
14.1 Summary of Key Points
Proper trolling motor wiring ensures safety, efficiency, and reliability. Always use the correct wire gauge, select suitable batteries, and install proper circuit protection. Grounding is essential for system stability. Follow manufacturer guidelines to avoid common mistakes. Regular maintenance, like inspecting wires and connections, prolongs system longevity. Prioritize electrical safety to prevent hazards. By adhering to these principles, you can enjoy a trouble-free and optimal trolling motor performance.
14.2 Final Tips for a Successful Installation
- Always test components before installation to ensure functionality.
- Use the correct wire gauge and high-quality connectors for optimal performance.
- Secure all wires and connections to prevent damage from vibrations or moisture.
- Follow manufacturer guidelines to avoid common mistakes.
- Test the system thoroughly before initial use.
- Regularly inspect and maintain wiring and connections for longevity.
Leave a Reply