
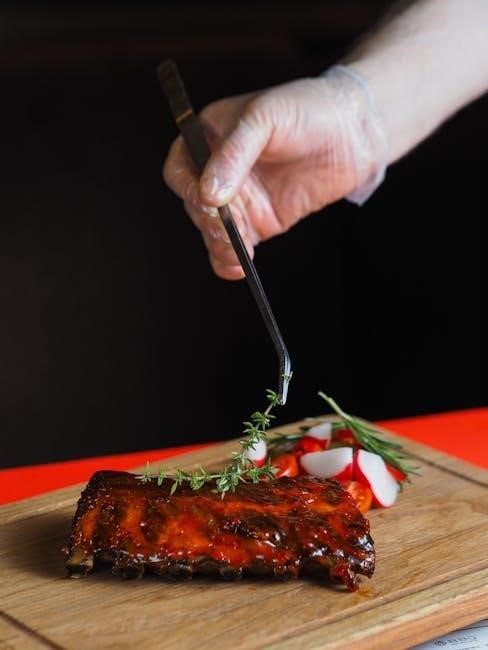
Kingsford Ribs offer a convenient, pre-cooked solution for delicious, tender ribs with rich BBQ flavor, perfect for oven, grill, or microwave cooking methods․
1․1 Overview of Kingsford Pre-Cooked Ribs
Kingsford Pre-Cooked Ribs are a convenient, ready-to-heat solution for tender and flavorful meals․ They come fully cooked and slathered in a rich BBQ sauce, offering a quick alternative to traditional slow-cooked ribs․ Available in baby back and spare rib options, these ribs are vacuum-sealed for freshness and boast a shelf life of up to 145 days when stored properly․ Designed for ease, they can be heated in the oven, microwave, grill, or stovetop, making them ideal for home cooks and professionals alike․ Kingsford ribs deliver a delicious, stress-free dining experience with minimal prep required․
1․2 Benefits of Using Kingsford Ribs
Kingsford Ribs offer unmatched convenience and flavor, making them a top choice for home cooks and professionals․ Their pre-cooked nature saves time, eliminating the need for lengthy preparation․ The ribs are consistently tender and flavorful, with a rich BBQ sauce that enhances the dining experience․ They cater to various cooking preferences, whether oven, grill, microwave, or stovetop․ This versatility ensures delicious results regardless of the method chosen․ Kingsford Ribs are perfect for busy households, special occasions, or casual meals, providing a hassle-free way to enjoy restaurant-quality ribs at home․
1․3 Popularity of Kingsford Ribs in Modern Cooking
Kingsford Ribs have quickly become a staple in modern cooking due to their convenience and rich, smoky flavor․ Their pre-cooked design caters to busy lifestyles, offering a hassle-free way to enjoy tender, flavorful ribs without hours of preparation․ The ribs are widely available in stores and online, making them easily accessible for home cooks and professionals alike․ Their popularity stems from their ability to deliver restaurant-quality results with minimal effort, fitting perfectly into today’s fast-paced, yet flavor-driven culinary trends․
Their versatility in cooking methods further enhances their appeal, ensuring they suit various preferences and skill levels․ Kingsford Ribs are a modern solution for those seeking delicious, stress-free meals without compromising on taste or quality․
Preparation for Cooking Kingsford Ribs
Begin by removing the ribs from packaging, ensuring they are fully thawed for even cooking․ Gather essential tools like aluminum foil, a baking pan, and tongs․
2․1 Thawing Instructions for Kingsford Ribs
To ensure even cooking, thaw Kingsford Ribs thoroughly․ Place them in the refrigerator for 24-48 hours or thaw in cold water, changing water every 30 minutes․ Avoid thawing at room temperature to prevent bacterial growth․ Once thawed, pat dry with paper towels to remove excess moisture․ Do not refreeze after thawing․ Proper thawing ensures tender and flavorful results when cooking․ Always follow safe food handling practices to maintain quality and safety․
2․2 Removing Ribs from Packaging
To remove Kingsford Ribs from packaging, use scissors to carefully cut open the plastic pouch or wrapper․ Gently peel away the inner film or packaging to avoid tearing the meat․ Place the ribs on a clean surface or directly on a prepared baking pan․ Ensure the ribs are completely free from packaging material before cooking․ For oven or grill preparation, you may place them directly on the surface or wrap them in foil․ Proper handling ensures even cooking and prevents any packaging residue from affecting the flavor․ Always handle the ribs with clean utensils or gloves to maintain hygiene․
2․3 Essential Tools and Equipment Needed
Cooking Kingsford Ribs requires specific tools to ensure a smooth and successful process․ A baking pan or grill grate is essential for placing the ribs․ Aluminum foil is recommended for wrapping ribs during cooking to retain moisture and flavor․ Scissors are needed to cut open packaging, while oven mitts or tongs are useful for handling hot ribs․ For oven cooking, a middle-positioned rack is ideal․ If grilling, a grill brush and charcoal setup are necessary․ Optional items include cooking spray to prevent sticking and a meat thermometer for monitoring internal temperature․ These tools help achieve tender, flavorful ribs every time․
Oven Cooking Instructions
Preheat your oven to 400°F, placing the rack in the middle position․ Cover a baking pan with foil and cook refrigerated ribs for 45-50 minutes or frozen ribs for 60-70 minutes․ Open carefully to avoid hot steam․
3․1 Preheating the Oven to the Correct Temperature
Preheating your oven to the correct temperature is essential for evenly cooking Kingsford Ribs․ Set your oven to 400°F (200°C) and ensure the rack is in the middle position for optimal air circulation․ Allow the oven to preheat for at least 10-15 minutes to ensure it reaches the desired temperature․ This step ensures the ribs cook consistently and prevents undercooking or burning․ Always double-check the temperature using an oven thermometer for accuracy․ Proper preheating guarantees tender, flavorful ribs with a perfectly caramelized BBQ glaze․
3․2 Placing Ribs in the Oven
After preheating, carefully remove the ribs from their packaging and place them meat-side up on a baking pan lined with aluminum foil․ Ensure the ribs are evenly spaced to allow proper air circulation․ If using multiple slabs, arrange them in a single layer to prevent overcrowding․ Position the pan in the center of the oven rack to ensure even cooking․ Close the oven door gently to maintain consistent heat․ This placement ensures the ribs cook evenly and prevents burning․ Always handle the pan with oven mitts to avoid burns․
3․3 Recommended Cooking Time for Oven-Baked Ribs
For refrigerated ribs, bake at 400°F for 45-50 minutes, while frozen ribs require 60-70 minutes․ Ensure the internal temperature reaches 165°F for food safety․ Place ribs meat-side up on a foil-lined pan․ For best results, baste or glaze during the last 10-15 minutes․ Avoid overcrowding the pan for even cooking․ If using a meat thermometer, insert it into the thickest part of the meat․ Let ribs rest for a few minutes before serving to retain juices and ensure tenderness․ Always handle hot pans with oven mitts to prevent burns․ This method guarantees tender, flavorful ribs every time․
3․4 Basting and Glazing Techniques
Baste ribs with BBQ sauce every 10-15 minutes during the last 30 minutes of cooking for enhanced flavor․ Use a brush to evenly coat the meat․ For glazing, apply a thick layer of sauce during the final 10 minutes to create a caramelized crust․ Avoid opening the oven too often to maintain consistent heat․ Optional: Mix sauce with a little water to prevent burning․ Ensure the ribs are nicely coated but not dripping excessively․ This technique ensures tender, flavorful, and visually appealing ribs․ Always handle hot pans with care to avoid burns․ Proper basting and glazing elevate the texture and taste of Kingsford ribs․
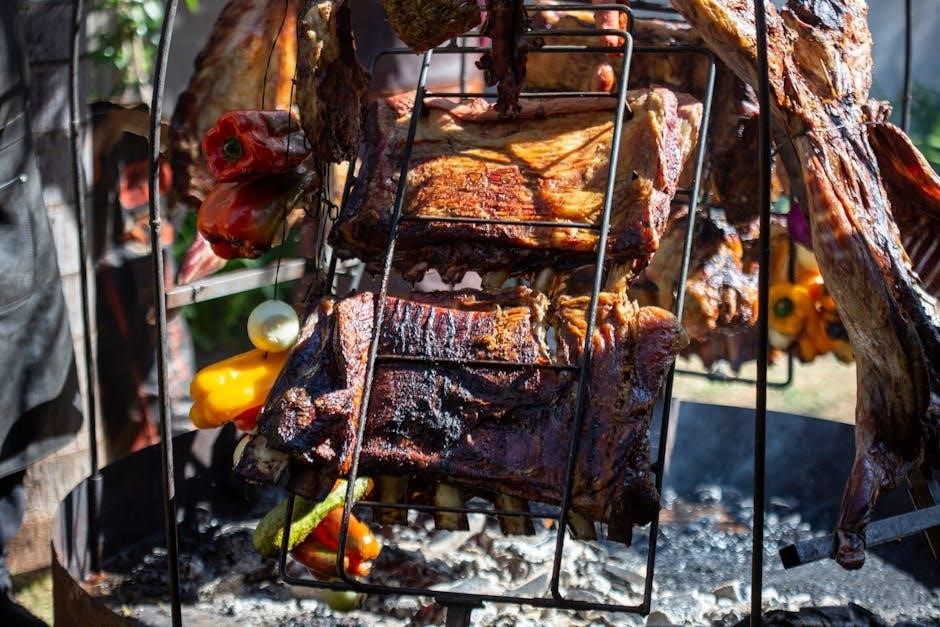
Grill Cooking Instructions
Preheat the grill to 400°F, place ribs meat-side up, and cook for 15-20 minutes․ Ensure even browning and use indirect heat for tender results․ Baste occasionally for flavor․
4․1 Setting Up the Grill for Indirect Heat
To set up your grill for indirect heat, arrange coals on one side, leaving the other side empty․ Place a small aluminum pan filled with water on the empty side to add moisture․ Preheat the grill to 225-250°F, ensuring the grates are clean and lightly oiled․ Position the ribs meat-side up on the cool side of the grill․ Close the lid and maintain the temperature by adjusting vents as needed․ This setup ensures slow, even cooking without direct flame exposure, promoting tender and flavorful results․ Proper airflow and temperature control are key for achieving perfectly cooked ribs․ Always monitor the grill during the process․
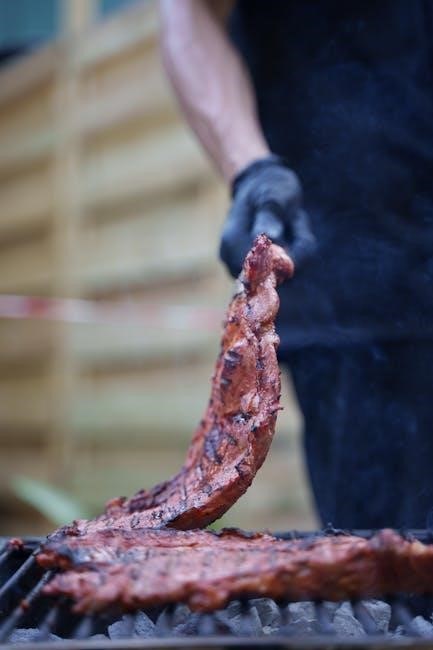
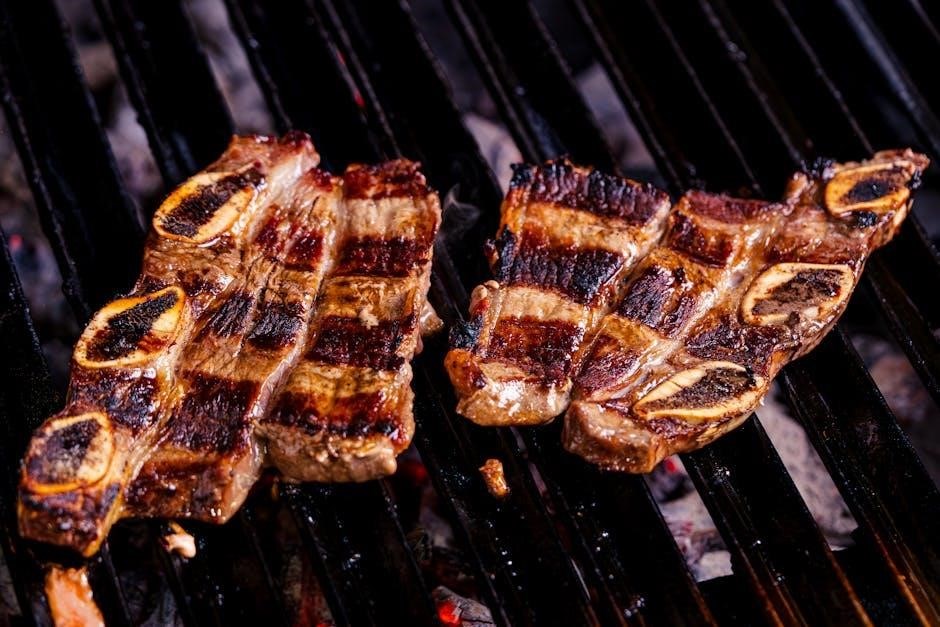
4․2 Placing Ribs on the Grill Grate
Place the ribs bone-side down on the grill grate over indirect heat․ Ensure they are evenly spaced to allow proper airflow․ After 4-5 minutes, flip the ribs to meat-side down and continue cooking․ This method promotes even browning and prevents sticking․ Use tongs or a spatula to handle the ribs gently, avoiding direct contact with the grill surface․ Proper placement ensures the ribs cook uniformly and retain their tender texture․ Always follow safe handling practices to avoid burns or damage to the ribs․ This step is crucial for achieving the perfect balance of flavor and texture during the grilling process․
4․3 Maintaining the Optimal Temperature
Maintain a consistent grill temperature between 225°F and 250°F for optimal cooking; Use a thermometer to monitor heat levels and adjust vents as needed․ Keep the grill closed to retain heat and ensure even cooking․ Periodically spritz the ribs with water or BBQ sauce to keep them moist and enhance flavor․ Avoid frequent opening of the grill to prevent heat loss․ By maintaining a stable temperature, the ribs will cook slowly and evenly, resulting in tender and flavorful meat․ This step is essential for achieving the perfect texture and taste in your Kingsford Ribs․
4․4 Spritzing and Basting on the Grill
Spritzing and basting are essential for maintaining moisture and enhancing flavor while grilling Kingsford Ribs․ Use a mixture of water, BBQ sauce, or apple cider vinegar to spritz the ribs every 30 minutes to an hour․ This helps keep the meat tender and prevents drying out․ For basting, apply a thin layer of BBQ sauce or marinade during the last 10-15 minutes of cooking to ensure a caramelized finish․ Always baste after flipping the ribs to evenly distribute the flavor․ These techniques ensure the ribs remain juicy and flavorful throughout the grilling process, delivering a delicious final result․
Microwave Cooking Instructions
Microwave cooking offers a quick way to heat Kingsford Ribs․ Bake refrigerated ribs for 45-50 minutes or frozen ribs for 60-70 minutes until hot․ Handle with care to avoid steam burns․
5․1 Heating Ribs in the Microwave Safely
Heating Kingsford Ribs in the microwave is a quick and convenient method․ For refrigerated ribs, cook for 45-50 minutes, while frozen ribs require 60-70 minutes․ Ensure the ribs are placed meat-side down in the microwave-safe dish․ Cover the dish with a microwave-safe lid or plastic wrap to retain moisture and promote even heating․ After cooking, carefully remove the dish as steam will escape vigorously․ Let the ribs rest for a few minutes before serving to avoid burns․ Always use oven mitts or tongs to handle the hot dish, ensuring a safe and enjoyable cooking experience․
5․2 Recommended Cooking Time in the Microwave
For optimal results, refrigerated Kingsford Ribs should be microwaved for 45-50 minutes, while frozen ribs require 60-70 minutes․ Place the ribs meat-side down in a microwave-safe dish, ensuring they are evenly spaced․ Cover the dish with a microwave-safe lid or plastic wrap to trap steam and promote even heating․ Check for doneness by ensuring the internal temperature reaches 165°F․ Be cautious when removing the dish, as it will be hot․ This method ensures tender, flavorful ribs with minimal effort and time, perfect for a quick meal without compromising on quality or taste․
5․3 Handling Steam When Opening the Microwave
When opening the microwave after cooking Kingsford Ribs, proceed with caution due to the hot steam that will escape․ Use oven mitts or a towel to protect your hands from burns․ Allow the steam to dissipate slightly before removing the dish․ Never lean over the microwave as the steam releases, as it can cause burns․ Let the ribs stand for a minute or two to reduce steam intensity․ This step ensures safety and prevents accidental burns while handling the dish․ Always prioritize caution when dealing with hot foods and steam in the microwave to avoid injuries․
Stove Cooking Instructions
Stovetop cooking offers a quick and flavorful way to heat Kingsford Ribs․ Use a skillet over medium heat, ensuring even cooking and caramelized BBQ sauce for tender results․
6․1 Heating Ribs on the Stovetop
Heating Kingsford Ribs on the stovetop is a quick and flavorful method․ Place the ribs in a skillet over medium heat, adding a small amount of water or BBQ sauce to prevent drying․ Cover the skillet to retain moisture and promote even heating․ Cook for 5-7 minutes on each side, or until the ribs are heated through and the sauce is caramelized․ Stir occasionally to ensure consistent heat distribution․ This method is ideal for achieving tender, juicy ribs with a rich, smoky flavor․ Always use caution when handling hot pans and ribs․
6․2 Using a Skillet or Pan for Stovetop Cooking
Using a skillet or pan is an excellent way to heat Kingsford Ribs on the stovetop․ Choose a skillet large enough to fit the ribs in a single layer․ Add a small amount of water, broth, or BBQ sauce to the pan to keep the ribs moist․ Place the ribs meat-side down and cover the skillet to ensure even heating․ Cook on medium-low heat for 5-7 minutes per side, or until the ribs are heated through and the sauce is caramelized․ Stir occasionally to prevent sticking․ This method allows for quick, flavorful results with minimal effort․
6;3 Monitoring Temperature and Moisture
When cooking Kingsford Ribs on the stovetop, it’s crucial to monitor both temperature and moisture to ensure tender and flavorful results․ Keep the heat at a medium-low setting to avoid drying out the meat․ Use a food thermometer to check the internal temperature, which should reach 165°F for safety․ Add water, broth, or BBQ sauce periodically to maintain moisture and prevent the ribs from sticking to the pan․ Covering the skillet or pan can help retain steam and promote even heating․ Avoid overheating, as this can make the ribs tough․ Regularly check the ribs to ensure they remain juicy and well-coated with sauce․
Slow Cooker Instructions
Kingsford Ribs can be easily prepared in a slow cooker․ Place ribs in the slow cooker, add your favorite BBQ sauce, and cook on low for 3-4 hours․
7․1 Preparing Ribs for the Slow Cooker
Start by removing the Kingsford Ribs from their packaging and placing them in the slow cooker․ Position the ribs bone-side down for even cooking․ Add your preferred BBQ sauce or seasoning to enhance flavor․ For extra moisture, pour 1/4 cup of liquid, such as broth or water, into the slow cooker․ Optionally, wrap the ribs in foil to retain heat and flavor․ Ensure the slow cooker is set to low for 3-4 hours․ This method ensures tender, fall-off-the-bone results without constant supervision․ Use a slow cooker liner for easy cleanup and baste periodically for added moisture․
7․2 Setting the Slow Cooker to the Right Mode
For optimal results, set your slow cooker to the low heat setting․ Cook the ribs on low for 3-4 hours to ensure tender, fall-off-the-bone texture․ If you’re short on time, use the high heat setting, reducing the cooking time to 1․5-2 hours․ Avoid overcooking, as it can dry out the meat․ Always place the ribs bone-side down for even heat distribution․ Use a slow cooker liner for easy cleanup․ Ensure the lid is securely closed to retain moisture and flavor․ This method guarantees perfectly cooked ribs with minimal effort․ Adjust settings based on your schedule for the best outcome․
7․3 Cooking Time and Temperature Guidelines
For slow cooker preparation, cook Kingsford Ribs on low for 3-4 hours or high for 1․5-2 hours․ The optimal temperature for tender ribs is 275-300°F on low and slightly higher on high․ Ensure the internal temperature reaches 165°F for food safety․ Avoid overcooking, as it can dry out the meat․ Use a meat thermometer to check doneness․ Maintain consistent heat by minimizing lid opening․ This method ensures flavorful, fall-off-the-bone ribs with minimal effort․ Adjust cooking time based on your preference for texture․ Always follow safe cooking practices to achieve perfectly cooked ribs every time․
Tips for Achieving Tender and Flavorful Ribs
Use foil wrapping, baste regularly, and maintain moisture to keep ribs tender․ Add BBQ sauce towards the end for enhanced flavor without burning․ Ensure even cooking for perfect results․
8;1 The Importance of Foil Wrapping
Foil wrapping is essential for maintaining moisture and tenderness in Kingsford Ribs․ It prevents overcooking and ensures even heat distribution․ Wrap ribs tightly in aluminum foil during cooking to lock in juices and flavors․ This method is particularly effective for oven or grill cooking, as it creates a steamy environment that enhances texture․ For added flavor, brush ribs with seasoning or sauce before wrapping․ Remove foil in the final stages of cooking to caramelize the sauce, achieving a sticky, glazed finish․ Proper foil wrapping ensures ribs stay juicy and flavorful, making it a crucial step in achieving perfection․
8․2 Basting Techniques for Maximum Flavor
Basting is a key technique to enhance the flavor of Kingsford Ribs․ Regularly applying BBQ sauce or marinade ensures a rich, tangy glaze․ For oven or grill cooking, baste ribs every 20-30 minutes to lock in moisture and intensify flavor․ Use a brush or mop to evenly distribute the sauce, focusing on the meaty side; Avoid over-basting, as it can make the ribs overly sweet․ For a caramelized finish, baste generously in the final 10 minutes of cooking․ This step adds depth and ensures the ribs are tender, juicy, and full of flavor, making them a perfect centerpiece for any meal․
8․3 Ensuring Internal Temperature is Reached
Ensuring the internal temperature of Kingsford Ribs reaches 165°F is crucial for food safety and tenderness․ Use a meat thermometer to check the thickest part of the meat, avoiding the bone․ For oven-cooked ribs, insert the thermometer into the meatiest section․ On the grill or stovetop, monitor temperature regularly․ Let ribs rest for 5-10 minutes before serving to retain juices․ Proper temperature control prevents overcooking and ensures a juicy, flavorful result․ This step is vital for achieving perfectly cooked, safe-to-eat ribs every time, whether using oven, grill, or stovetop methods․
8․4 Keeping Ribs Moist During Cooking
Keeping ribs moist during cooking is essential for tender and flavorful results․ Spritzing with liquids like apple cider vinegar or water every 20-30 minutes helps retain moisture․ Wrapping ribs in foil during cooking, especially in the oven or grill, traps steam and prevents drying․ Using a water pan on the grill adds humidity, ensuring juiciness․ Consistent basting with BBQ sauce or marinade also contributes to moisture retention․ Avoid overcooking, as it can dry out the meat․ By maintaining a balance of heat and hydration, you can achieve perfectly tender and moist ribs every time, regardless of the cooking method chosen․
8․5 Adding BBQ Sauce at the Right Time
Adding BBQ sauce at the right time enhances flavor without burning․ Brush sauce evenly during the last 10-15 minutes of cooking to allow it to caramelize․ For oven or grill, apply sauce near the end to prevent charring․ Microwaving or stovetop methods may require shorter sauce application times․ Lightly coat ribs to avoid overpowering their natural taste․ Adjust sauce quantity based on personal preference, ensuring it complements the meat’s tenderness․ Proper timing ensures a sticky, flavorful glaze that elevates the ribs’ overall appeal, making them perfect for any meal or gathering․
8․6 Handling and Serving Ribs Safely
Handling and serving ribs safely is crucial to avoid burns and ensure a pleasant dining experience․ Always use oven mitts or tongs to remove ribs from heat sources․ Place them on a stable, heat-resistant surface to cool slightly before slicing․ Use a sharp knife to cut into portions, and let the ribs rest for a few minutes to retain juices․ Serve with utensils to prevent direct contact with hot meat․ Ensure all packaging materials are removed before serving; Keep ribs away from children and pets while handling․ Proper handling ensures safety and enjoyment for everyone at the table․
Storage and Reheating Instructions
Store cooked ribs in a sealed container in the fridge for up to 3 days or freeze for up to 3 months․ Reheat in the oven, microwave, or on the stovetop to an internal temperature of 165°F․ Always thaw frozen ribs before reheating for best results․
9․1 Storing Cooked Ribs Properly
Proper storage ensures Kingsford Ribs remain fresh and flavorful․ After cooking, let the ribs cool slightly before refrigerating or freezing․ For refrigeration, place them in an airtight container and store for up to 3 days․ For longer storage, wrap the ribs tightly in plastic wrap or aluminum foil and freeze for up to 3 months․ When freezing, consider portioning to thaw only what you need․ Always thaw frozen ribs in the refrigerator overnight before reheating․ Proper storage prevents drying out and maintains the tender, juicy texture of the ribs․
9․2 Reheating Ribs Without Drying Them Out
To reheat Kingsford Ribs without losing moisture, wrap them tightly in aluminum foil and warm them in a preheated oven at 300°F for 15-20 minutes․ For grill reheating, place ribs over low heat, brushing with BBQ sauce to retain juiciness․ In the microwave, heat ribs on medium power for 2-3 minutes, checking to avoid overcooking․ Adding a tablespoon of water or sauce in the foil helps keep them tender․ Use a thermometer to ensure internal temperature reaches 165°F․ Avoid overheating, as it can dry out the meat․ Proper reheating ensures ribs stay tender and flavorful, ready to enjoy at their best․
9․3 Freezing and Thawing Instructions
Kingsford Ribs can be frozen in their original packaging or placed in an airtight container for up to 4 months․ To thaw, refrigerate overnight or submerge in cold water for 30 minutes․ Pat dry with paper towels before reheating to prevent drying out․ Ensure ribs are sealed tightly to maintain freshness and prevent freezer burn․ Proper freezing and thawing techniques help preserve the tender texture and flavorful quality of the ribs․ Always store at 0°F or below for optimal results․ Follow these steps to enjoy your ribs at their best, even after freezing and reheating․
Kingsford Ribs offer a hassle-free, flavorful experience with versatile cooking options․ Perfect for any skill level, they ensure tender, delicious results every time—ideal for quick, enjoyable meals․
10․1 Summary of Cooking Methods
Kingsford Ribs can be cooked using various methods to suit any preference․ Oven baking at 400°F for 45-50 minutes yields tender results, while grilling over indirect heat for 2-3 hours adds smoky flavor․ Microwave cooking offers quick convenience, requiring 10-12 minutes for refrigerated ribs․ Stovetop heating in a skillet is ideal for a crispy finish, and slow cookers provide a hands-off, flavorful experience․ Each method ensures juicy, flavorful ribs with minimal effort, making Kingsford Ribs a versatile choice for home cooks and barbecue enthusiasts alike․
10․2 Final Tips for Perfect Kingsford Ribs
For perfect Kingsford Ribs, always wrap in foil to retain moisture and flavor․ Baste regularly to enhance tenderness and taste․ Ensure internal temperature reaches 165°F for safety and doneness․ Keep ribs moist by spritzing or basting during cooking․ Add BBQ sauce toward the end to avoid burning․ Handle ribs carefully to prevent burns from steam or hot surfaces․ Let them rest briefly before serving to lock in juices․ Experiment with seasoning and sauces for a personalized touch․ Whether grilled, baked, or microwaved, these tips ensure delicious, fall-off-the-bone ribs every time․
10;3 Encouragement to Experiment and Enjoy
Embrace the versatility of Kingsford Ribs and make every meal a delightful experience․ Whether you prefer oven-baked, grilled, or microwaved, these ribs offer endless possibilities․ Don’t hesitate to experiment with different sauces, seasonings, or cooking methods to find your perfect flavor․ The pre-cooked convenience allows you to focus on creativity rather than prep time․ Share the joy of tender, flavorful ribs with family and friends, creating memorable moments around the table․ Take pride in your culinary skills and enjoy the satisfaction of a delicious meal made easy․ Get creative, savor the taste, and make every bite a celebration!
Leave a Reply